If you want to build a DIY Endless Climbing Wall, the anchoring system is one of the most important parts of the entire build.
A rotating climbing wall does not behave like a normal fixed wall. It carries significant weight, it moves, and once you incline it, the load path changes again. That means the anchor points must do more than simply hold the frame in place. They must safely transfer the forces created by the wall into the building or support structure over time.
This is exactly why anchoring needs to be planned carefully from the beginning.
In this guide, I will break down the key anchoring principles for an Endless Climbing Wall at home, including lower anchors, upper fixation, hardware choices, redundancy, and the most common mistakes to avoid.
Quick Answer
To anchor an Endless Climbing Wall safely, the lower frame must be fixed with strong structural hardware, the upper fixing point must resist forward pulling forces when the wall is inclined, and the entire load path must remain stable and predictable. For my own setup, I use two heavy-duty angle irons per side at the bottom, threaded bolts instead of standard wood screws, and two upper climbing hanger anchor points per side for added redundancy.
Why Anchoring Is So Important on a Rotating Climbing Wall
A fixed climbing wall mainly transfers load into its frame and into the wall behind it. An Endless Climbing Wall is different.
Because it rotates, the frame is not just carrying static force. Once the wall is tilted, it creates pulling forces at the top and additional load changes at the bottom. The support system has to handle:
- the dead weight of the wall
- movement during rotation
- changing force directions as the angle changes
- concentrated load at the upper anchor points
- repeated load over time
That is why a rotating climbing wall needs a more serious anchoring approach than many people initially expect.
The Two Main Parts of the Anchor System
For a typical anchored Endless Climbing Wall setup, the support concept has two main structural parts:
- the lower fixing points
- the upper fixing points
Both are essential, but they do different jobs.
The lower anchors connect the wall frame to the ground or base structure. The upper anchors stop the wall from tipping forward and carry the pulling forces that increase when the wall is inclined.
If one of these parts is weak, the entire wall becomes unreliable.
How the Lower Anchors Work
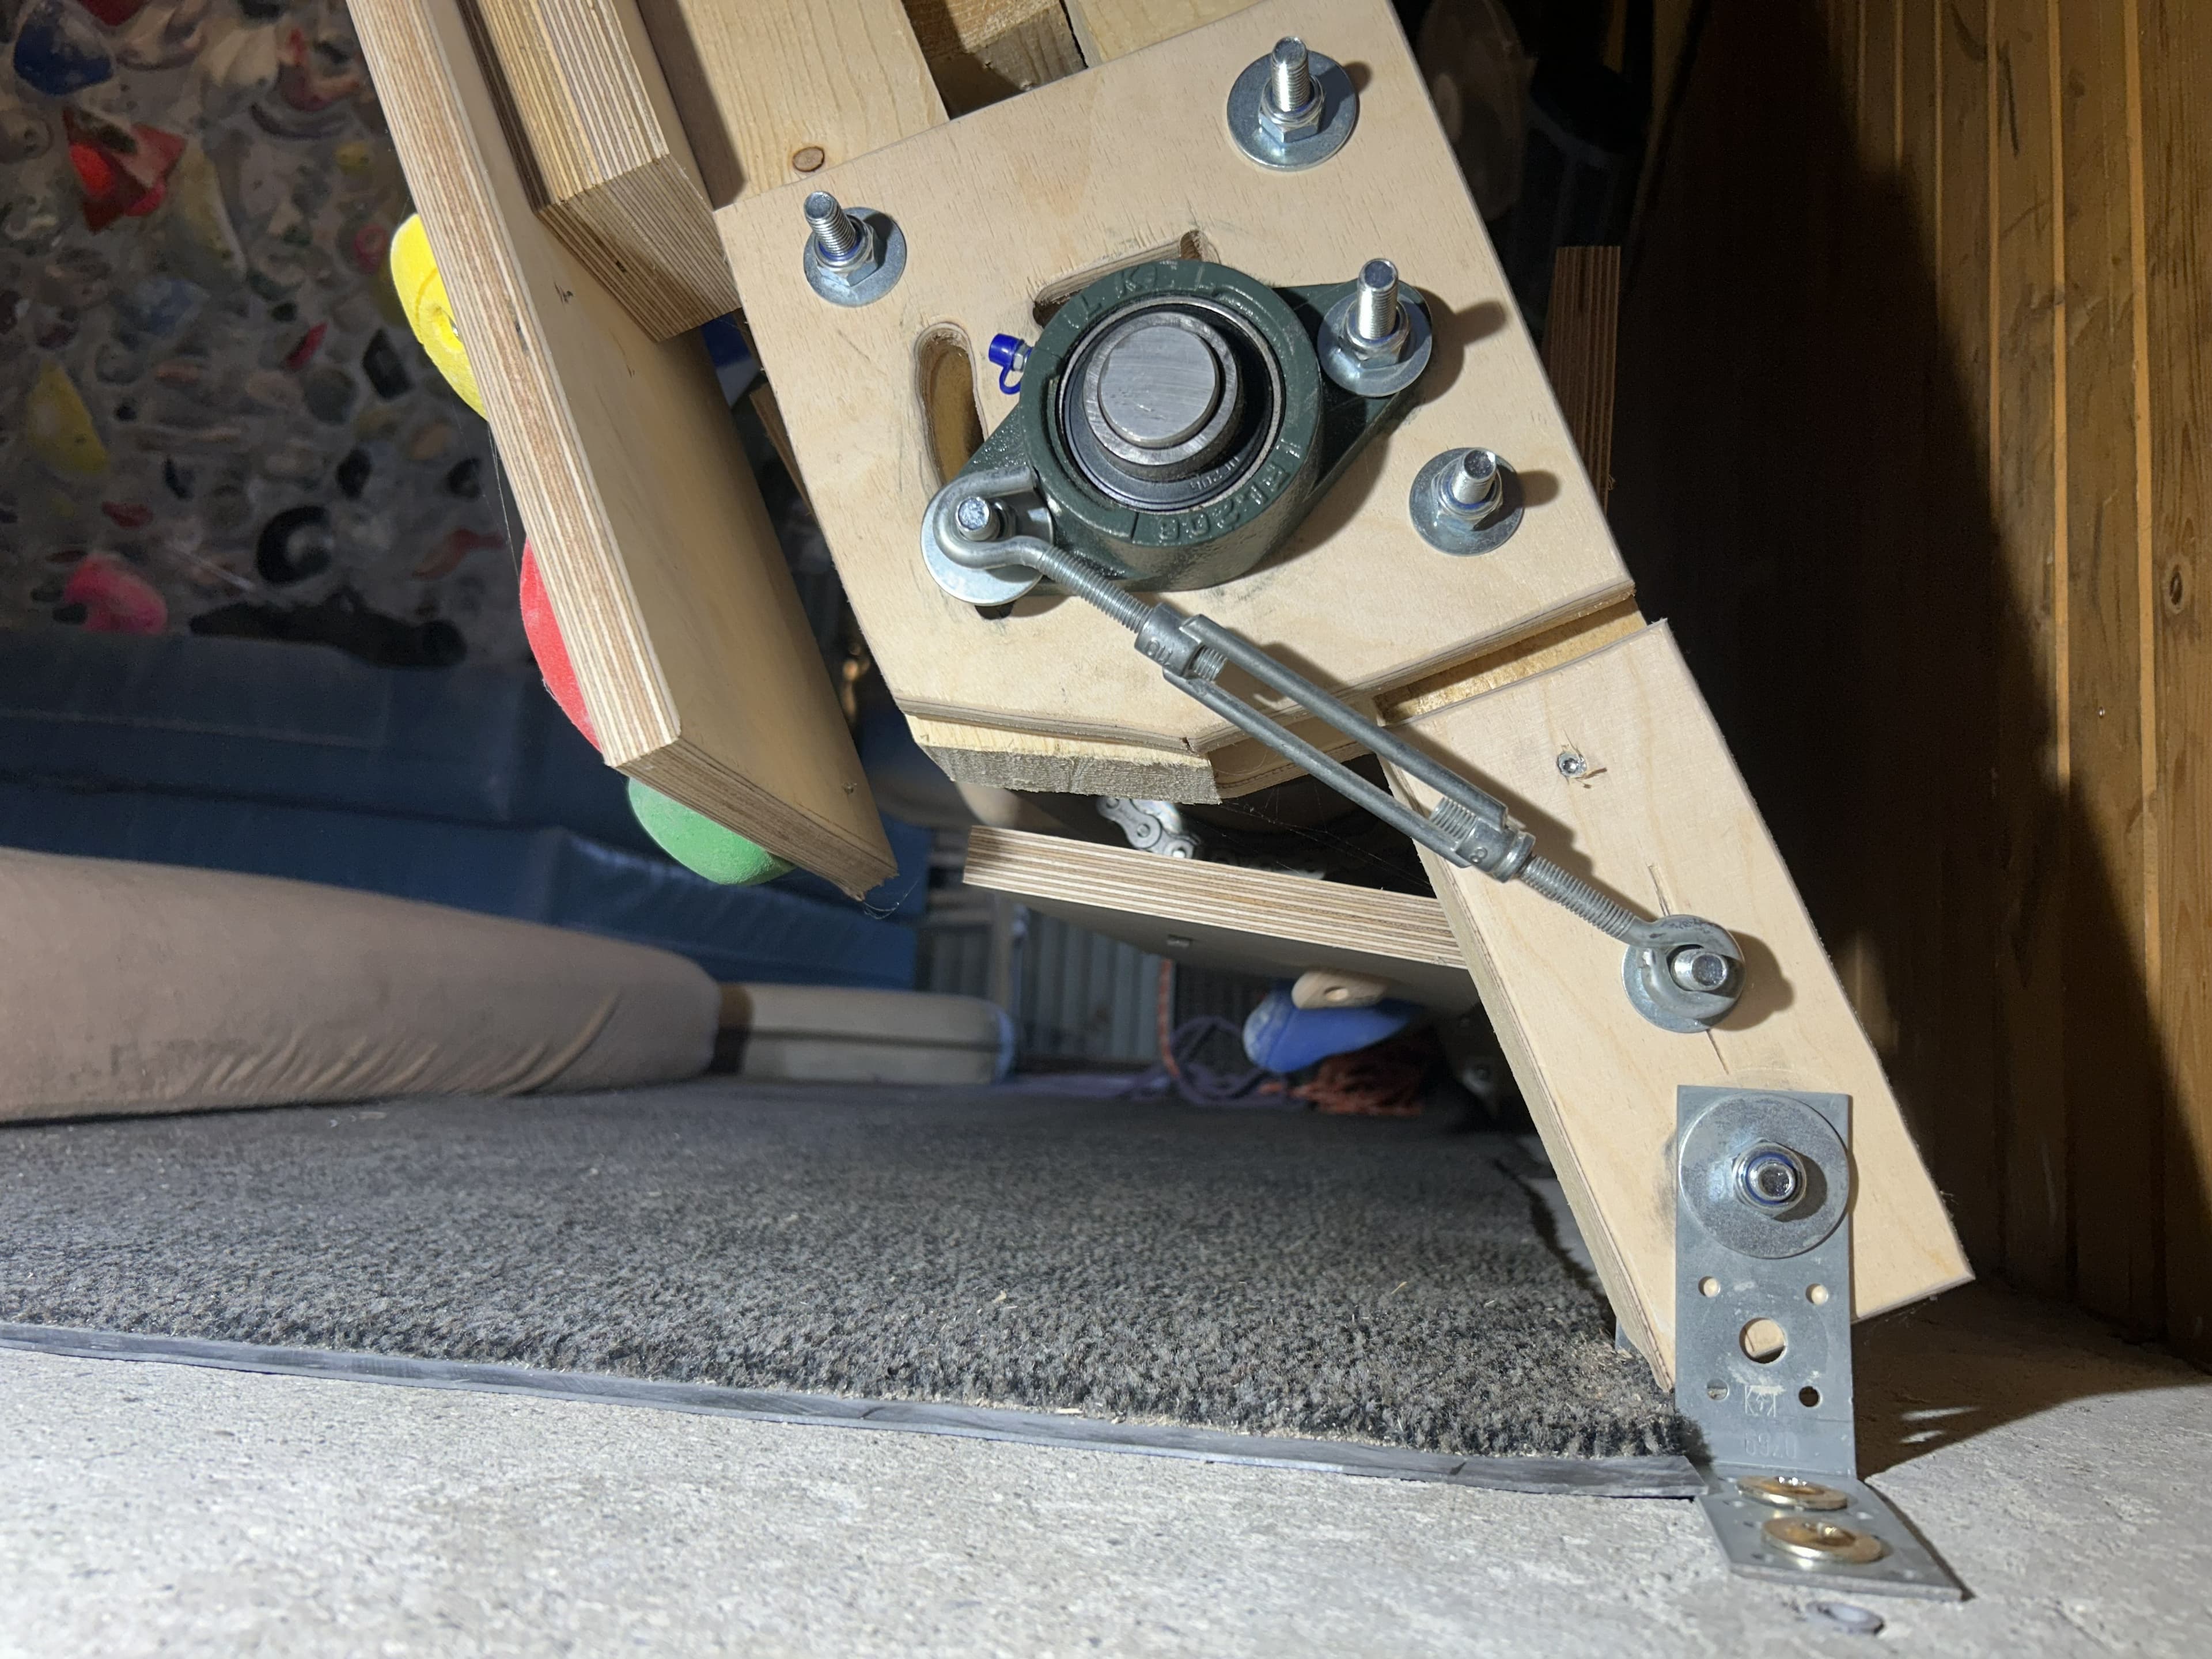
The lower part of the frame is where the wall is fixed near the floor. In my setup, each side of the frame is secured using two heavy-duty angle irons, which means four angle irons in total.
These angle irons are not there as a minor reinforcement. They are structural components that connect the wall frame to the building.
Why I use two angle irons per side
This is not theoretical for me. On my first wall, I used only one angle iron per side.
As soon as I changed the incline of the wall, the frame ripped out of the floor.
After switching to two angle irons per side, the setup became completely solid.
That experience changed my view on this part of the build. The lower anchors are not something to underbuild.
Why the angle irons should be bolted through the frame
The angle irons should be fixed through the wooden base frame using threaded bolts, not just attached with wood screws.
This matters for two reasons:
First, a threaded bolt through the wooden frame creates a much stronger long-term connection than a simple wood screw.
Second, the bolt axis allows a small amount of controlled rotation as the wall changes angle. The angle iron itself remains firmly fixed, but the connection can still accommodate the movement of the wall in the way it needs to.
That is a much better solution for a rotating wall than a rigid screw-only connection that is not designed for this type of load and motion.
Why Standard Wood Screws Are Not Enough
This is one of the most important points in the whole article.
For the main structural anchor points of an Endless Climbing Wall, standard wood screws are not enough.
A rotating wall is heavy. The full wall can easily weigh around 100 to 150 kilograms, depending on materials and exact design. Once that weight is moving and the wall is inclined, the anchor points are exposed to serious force.
Standard wood screws are not the right hardware for that job because:
- they are weaker under structural load
- they are less reliable long term in this application
- they do not provide the same stiffness as a proper bolted connection
- they are more likely to become the weak point in a rotating system
For the main frame anchoring, I recommend threaded bolts with at least 8 mm diameter. That is what I personally use on my own wall.
How the Lower Anchors Are Fixed Into the Floor
Each angle iron must also be fixed into the floor itself using strong anchor bolts.
In my setup, each angle iron is fixed into the ground with two strong floor anchor bolts. These anchors go deep into the floor and are paired with plugs or anchor hardware matched to the bolt size and the building material.
The exact hardware depends on the floor type, but the principle stays the same:
- the angle iron must sit firmly
- the floor anchors must be properly dimensioned
- the connection must stay stiff under repeated load
This is not a decorative connection. It is a core structural anchor point.
Why the Upper Anchor Is Even More Critical Than Many People Think
Many people focus heavily on the bottom of the frame, but the upper fixing point is just as important, and in some ways even more critical.
Why?
Because the wall can rotate around the lower fixing point. That means if the top is not secured properly, the wall will naturally want to tilt forward under its own weight.
As soon as you incline the wall, the force at the top increases significantly. That upper anchor is now resisting the tendency of the wall to pull away and rotate forward.
In other words, the bottom supports the base, but the top controls the wall’s forward stability.
That is why the upper anchor point must be treated as a serious structural fixing point, not as a lightweight add-on.
How I Anchor the Top of My Endless Climbing Wall
In my own setup, I fixed the upper anchors into a thick wooden roof beam in my garage.
I drilled directly through the beam and used threaded bolts. I did not use simple wood screws for this part.
For the actual anchor points, I also did not use cheap standard brackets from a hardware store. Instead, I used climbing hangers, the same type of hardware used on real climbing routes.
The reason is simple: climbing hangers are designed for high loads and are far better suited to this application than weak or unknown brackets.
For each side, I installed:
- one main upper anchor
- one second upper anchor for redundancy
That means I have two upper anchor points per side.
Why Redundancy Matters
Redundancy means there is a backup load path if one component fails.
In a well-built system, failure is unlikely. But when a wall weighs over 100 kilograms and is used repeatedly over time, it makes sense to eliminate unnecessary single points of failure.
That is why I use a second upper anchor on each side.
This redundancy adds an extra layer of safety and confidence. Even if one hanger or bolt were ever compromised, the second anchor would immediately take over the load.
For me, this is a very worthwhile safety feature on a home Endless Climbing Wall.
Why Climbing Hangers Make Sense
Climbing hangers are not just a nice extra. They are one of the smartest upgrades you can make for the upper anchoring system.
Compared with random hardware-store brackets, climbing hangers offer:
- hardware designed for very high loads
- a proven use case in climbing environments
- fewer weak points
- more confidence in the anchor connection
When the upper anchor is such a critical point in the system, it makes sense to use hardware that is actually designed for serious loading.
The Full Load Path Must Make Sense
One of the most important structural principles is that the load path must be clear.
That means you should be able to trace the forces from the wall into the anchor system and from there into the building or support frame.
For example:
- the wall frame transfers force into the lower angle irons
- the angle irons transfer force into the floor anchors
- the upper anchor points transfer pulling force into the beam or wall
- the building structure carries those loads safely
If one element in that chain is weak, the whole concept becomes questionable.
That is why it is not enough to buy strong bolts if they are attached to weak timber, weak brackets, or a weak building structure. Every part of the load path matters.
Common Anchoring Mistakes to Avoid
There are a few mistakes that are especially common in DIY structural builds like this.
1. Using only one angle iron per side
This was my own early mistake, and I would not repeat it. One angle iron per side is not enough for this application.
2. Using standard wood screws for main structural anchors
Wood screws may be acceptable in some secondary timber-to-timber connections, but not as the primary structural fixing method for the main anchor points of a rotating wall.
3. Underestimating the upper pulling forces
Once the wall is inclined, the upper anchor carries a lot of force. This is not a detail. It is one of the key load points in the whole system.
4. Anchoring into weak building material
Strong bolts are useless if they are fixed into a weak or unreliable structural element. The surrounding structure has to be strong enough too.
5. Skipping redundancy where it makes sense
A backup anchor is a smart safety measure, especially at the top of the wall.
6. Saving money on critical hardware
Angle irons, anchor bolts, threaded bolts, and upper anchors are not the place to cut corners.
What a Safe Anchoring Concept Should Achieve
A safe Endless Climbing Wall anchoring system should do the following:
- hold the wall securely at the base
- prevent forward tipping at the top
- stay stiff as the wall angle changes
- transfer forces clearly into the building
- avoid weak points in hardware selection
- include redundancy where useful
- remain reliable over repeated use
If your design achieves those points, you are on the right path.
My Honest Recommendation
If your space allows it, I strongly prefer an anchored setup with:
- two heavy-duty angle irons per side at the bottom
- threaded bolts of at least 8 mm diameter
- strong floor anchors
- a serious upper beam or wall fixing point
- climbing hangers instead of cheap brackets
- redundancy at the upper anchors
This is the setup philosophy I use myself because it creates a much more solid, predictable, and confidence-inspiring structure.
Final Thoughts
A DIY Endless Climbing Wall is only as good as its support system.
You can build a great frame, a smooth rotating system, and a solid climbing surface, but if the anchor concept is weak, the whole project is compromised.
That is why anchoring deserves careful planning. The bottom and top fixing points must work together, the hardware must match the load, and the building structure itself must be able to carry the forces involved.
If you get that part right, the wall will feel much more stable, much safer, and much better to use over time.
In the next article, I compare freestanding vs anchored Endless Climbing Wall setups so you can decide which route makes the most sense for your room, drilling options, and build goals.
Related Questions
How do you anchor an Endless Climbing Wall safely?
A safe Endless Climbing Wall anchor system uses strong lower anchors, a reliable upper fixing point, structural hardware such as threaded bolts, and a clear load path into the building or support frame.
What bolts should be used for a DIY Endless Climbing Wall?
For the main structural anchor points, threaded bolts of at least 8 mm diameter are a strong and reliable choice.
Are wood screws safe for a rotating climbing wall?
Standard wood screws should not be trusted for the main structural anchor points of a rotating climbing wall. They are not the best choice for long-term strength and stiffness in this application.
Why does an Endless Climbing Wall need upper anchors?
The upper anchors prevent the wall from tilting forward and carry increased pulling forces when the wall is inclined.
Why use climbing hangers on a DIY Endless Climbing Wall?
Climbing hangers are designed for high loads and provide a more reliable upper anchor point than cheap generic brackets.